Friday, March 30, 2012

How to Remove Facebook Timeline


Facebook users are often dissatisfied with it due to its controversial activities. One of them is Facebook timeline. Probably this is the most important issue at present for Facebook users. 

Timeline is a new kind of profile that lets you highlight the photos, posts and life events that help you tell your story. If you activate timeline then you'll have 7 days to preview what's there now. This gives you a chance to add or hide whatever you want before anyone else sees it. 

If you activate timeline once then there is no official way to deactivate it! Many users find it too complex as well as boring. 

If you wanna change back to the old style profile or if you haven't got Timeline yet, but just wanna see your friend's Timeline pages in the old style profile format, this guide is for you.

If you visit a personal Facebook Timeline with IE 7 then you will be shown old style profile page for that person. Because FB haven't created any version of timeline that is compatible with IE 7. 

But IE7 is no longer using by the users due to its several limitations and security issues. Now follow the steps below for your browser:

Google Chrome


To change Google Chrome's User Agent you first need to download the appropriate file below, depending on what Operating System you are using. The content of the file is basically the command listed below in the pale blue box. 

Chrome on Windows Vista & 7
If you are using Windows Vista or 7 the command in the file that will run Chrome with IE7 as the user agent is as follows : 
"%USERPROFILE%\AppData\Local\Google\Chrome\Application\chrome.exe" --user-agent="Mozilla/4.0 (compatible; MSIE 7.0; Windows NT 6.0)"

  1. Download (Right Click on the link, select Save link as... and save the .bat file to your Desktop)
  2. Then Install the F.B. Purity browser extension, as it will fix a lot of the display glitches that will occur when you have your browser set to impersonate IE7.
  3. Close all running Chrome browser Windows and Tabs, then click the previously downloaded .bat file and it will run Chrome with IE7 as its user agent.
  4. Now visit a personal Timeline page and you will see that it is now displayed as a normal, old style profile page. If at any point, you wanna go back to using the normal User Agent, just close all Chrome windows and then open Chrome using your usual Chrome Icon, instead of the Bat file. 


Chrome on Windows XP
If you are using Windows XP the command in the file to start Chrome with IE7 as the UserAgent is as follows: 
"%USERPROFILE%\Local Settings\Application Data\Google\Chrome\Application\chrome.exe" --user-agent="Mozilla/4.0 (compatible; MSIE 7.0; Windows NT 6.0)"
  1. Download  (Right Click on the link, select Save link as... and save the .bat file to your Desktop)
  2. Next Install the F.B. Purity browser extension, as it will fix a lot of the display glitches that will occur when you have your browser set to impersonate IE7.
  3. Close *all* open Chrome browser Windows then click the previously downloaded .bat file and it will run Chrome with the IE7 user agent.
  4. Now visit a personal Timeline page and you will see that it is now displayed as a normal, old style profile page. If you wanna go back to using the normal User Agent, just close all Chrome windows and then open Chrome using your usual Chrome Icon, instead of the Bat file.


Firefox on Windows, Mac or Linux
Its easy to switch Firefox's User Agent to IE7, the steps are as follows


  1. Install the "User Agent Switcher" Extension from addons.mozilla.org/firefox/addon/user-agent-switcher/
  2. Install the F.B. Purity browser extension, as it will fix most of the display glitches that occur when you switch the browser's User Agent to IE7, and it also has a lot of other cool and useful features for customising Facebook.
  3. Go to Firefox's "Tools/User Agent Switcher/Internet Explorer" menu and select "Internet Explorer 7" 
  4. Now go and view a personal Timeline page, it will be displayed in the old Profile format. BTW If you want to at any point switch the User Agent back to normal, just set the User Agent to "Default User Agent" or else just disable the "User Agent Switcher" extension.
  5. Now go and view a personal Timeline page, it will be displayed in the old Profile format. BTW If you want to at any point switch the User Agent back to normal, just set the User Agent to "Default User Agent" or else just disable the "User Agent Switcher" extension.

Safari on Mac & Windows


  1. Install the F.B. Purity browser extension, this will fix most of the display glitches that occur on Facebook when you use the IE7 User Agent, and it also has a lot of other cool and useful features for customising Facebook.
  2. To switch the User Agent in Safari, you need to first go into the "Preferences" menu, select "Advanced", then tick the "Show Develop menu in menu bar" option, then exit the preferences menu.
  3. Now click the page icon menu (next to the cog wheel icon) then select the develop/user agent menu, there you can choose the useragent you wish to use for the current website you are viewing. Select Internet Explorer 7. 
  4. Now view any personal Facebook Timeline page and it will be displayed in the old style Profile format.

N.B. If you want to restore your User Agent to normal in Safari then just follow Steps 1 and 2 again, but this time select the "Default" user agent

Opera on Windows, Mac or Linux


  1. Install the FB Purity browser extension, which will fix some of the display problems that arise when you set your browser to impersonate IE7, it also gives you lots of options for hiding spam and other news stories and facebook features that you dont want to see.
  2. To set the custom user agent in Opera, enter "opera:config#ISP|Id" into the url/address bar, then enter the Custom User Agent string "Mozilla/4.0 (compatible; MSIE 7.0; Windows NT 6.0)" and click "Save" 
  3. Restart your browser and view your profile page, or any other personal Timeline profile page, and it will display it in the old Profile format

N.B. If you wanna restore your User Agent to normal in Opera, just follow the first part of step 1 again, and then click the "Default" button then click "Save"

If you hate Timeline like most of the users then you may submit a complain directly to Facebook about it. To do so, go to Facebook's Official Timeline Feedback form.



How to Format a Virus Affected Flash/ Pen Drive?


In general, when we need to format a pen drive or hard disk drive then we open My Computer Window. Then select the drive and right click on it. Then we can format it. 

But when pen drive is affected by virus, then the task gets some difficulties! Don't worry. Because in this post I am gonna show you how to format a virus affected USB Flash Drive. 

Make sure your computer is secured with a strong and reliable security software. I prefer Microsoft Security Essential. Then scan your flash drive with it. And try to format it. 

If you're fail to format it. Then follow another method. At first, make a right click on My Computer from your desktop. Then select the manage option. Now at the left panel you will find an option named Disk Management. Click on it and you will see all of your disk drives listed here. Now you will be able to format any drive you need. Right click on them and hit on format. 

Follow the images below: 


Wednesday, March 28, 2012

How Do I Find My IP?


Internet users often required to find their IP. Many users know their IP or they know how to find IP address.

But some of them don't know how to find IP address. This post is for them.

Finding IP address is as easy as google seach! Just follow the steps below:

  1. Go here: WhatIsMyIP.com
  2. Now you will see a message like this: Your IP Address Is: 141.0.9.75 No Proxy Detected
  3. That means 141.0.9.75 is your IP

You can find more about your IP from this link. Go here and click on lookup. It will show you detail information about your IP. 


Add Floating Share Buttons on your Site: 7 Buttons!


Google Plus, Twitter, Facebook Favicon


To improve your traffic rank SEO can contribute a lot. Few years back SEO was somewhat difficult. But at present time SEO is little bit easier by the grace of social sites like twitter, facebook, google + etc.

Today I will show you how to add floating social share button to blogspot website. This code will provide you facebook like, Google +1,  Stumble Upon, Digg, Tweet, Linked in and Reddit button.

To add these floating buttons to your blog, just follow the steps below:

  1. Sign in to your blog
  2. Click design from the upper right corner 
  3. Click on layout and hit on Add a Gadget option
  4. Now you'll see a list of gadget and you need to select html/ java script gadget. It will show you  Configure HTML/JavaScript window
  5. Now copy the following code and paste it into the content box of Configure HTML/Java Script window
  6. Now save this gadget
Note: Make sure your blogger dashboard is set to the new look. Click here for more info. 

<!--SideBar Floating Share Buttons Code Start-->

<style>#pageshare {position:fixed; bottom:15%; left:3px; float:left; border: 1px solid black; border-radius:3px;-moz-border-radius:3px;-webkit-border-radius:3px;background-color:#eff3fa;padding:0 0 1px0;z-index:10;}#pageshare .sbutton {float:left;clear:both;margin:3px 3px 0 3px;}.fb_share_count_top {width:48px !important;}.fb_share_count_top, .fb_share_count_inner {-moz-border-radius:3px;-webkit-border-radius:3px;}.FBConnectButton_Small, .FBConnectButton_RTL_Small {width:49px !important; -moz-border-radius:3px;-webkit-border-radius:3px;}.FBConnectButton_Small .FBConnectButton_Text {padding:2px 2px 3px !important;-moz-border-radius:3px;-webkit-border-radius:3px;font-size:8px;}</style><div id='pageshare' title="Share This With Your Friends">

<div class='sbutton' id='gb'><script src="http://connect.facebook.net/en_US/all.js#xfbml=1"></script><fb:like layout="box_count" show_faces="false" font=""></fb:like></div>

<div class='sbutton' id='gplusone'><script type="text/javascript" src="https://apis.google.com/js/plusone.js"></script><g:plusone size="tall"></g:plusone></div><div class='sbutton' id='su'><script src="http://www.stumbleupon.com/hostedbadge.php?s=5"></script></div>

<div class='sbutton' id='digg' style='margin-left:3px;width:48px'><script src='http://widgets.digg.com/buttons.js' type='text/javascript'></script><a class="DiggThisButton DiggMedium"></a></div>

<div class='sbutton' id='rt'><a href="http://twitter.com/share" class="twitter-share-button" data-count="vertical" >Tweet</a><script src='http://platform.twitter.com/widgets.js' type="text/javascript"></script></div>

<div class='floatbutton' id='linkedin'><script src="//platform.linkedin.com/in.js" type="text/javascript"></script><script type="IN/Share" data-counter="top"></script></div>

<div class="sbutton" id="reddit"><script type="text/javascript" src="http://www.reddit.com/static/button/button2.js"></script><!-- AddThis Button BEGIN --><div class="addthis_toolbox addthis_default_style "><a class="addthis_counter"></a></div>

<!--SideBar Floating Share Buttons Code End--></div></div>

If everything is correct then you will be able to see a vertical floating share bar at the left side of your blog.

Customization: This code will give you the opportunity to customize as you like.

Add or Remove Button: You can add or remove button from this code. Notice that each code starts with <div class and ends with </div>. For your convenience I've separated the each code. If you wanna remove one or two codes then just delete the part of the code. When you wanna add something to this code make sure that the new code starts with <div class.

Position: At the beginning of this code you might notice a text like this- #pageshare {position:fixed; bottom:15%; left:3px; float:left;. Now, if you wanna place it to the right side then type right in the place of left. And you can also increase or decrease the size of the button if you are somewhat expert in coding.


Tuesday, March 27, 2012

Keyboard Shortcuts for MS Word (All Versions)

MS Word is the best program for typing. To accelerate your work there are lots of keyboard shortcuts provided with the program. Some of the important keyboard shortcuts provided by the official support page of Microsoft are listed below: 


      Command Name                            Shortcut Keys
   --------------------------------------------------------

All Caps CTRL+SHIFT+A
Annotation ALT+CTRL+M
App Maximize ALT+F10
App Restore ALT+F5
Apply Heading1 ALT+CTRL+1
Apply Heading2 ALT+CTRL+2
Apply Heading3 ALT+CTRL+3
Apply List Bullet CTRL+SHIFT+L
Auto Format ALT+CTRL+K
Auto Text F3 or ALT+CTRL+V
Bold CTRL+B or CTRL+SHIFT+B
Bookmark CTRL+SHIFT+F5
Browse Next CTRL+PAGE DOWN
Browse Previous CTRL+PAGE UP
Browse Sel ALT+CTRL+HOME
Cancel ESC
Center Para CTRL+E
Change Case SHIFT+F3
Char Left LEFT
Char Left Extend SHIFT+LEFT
Char Right RIGHT
Char Right Extend SHIFT+RIGHT
Clear DELETE
Close or Exit ALT+F4
Close Pane ALT+SHIFT+C
Column Break CTRL+SHIFT+ENTER
Column Select CTRL+SHIFT+F8
Copy CTRL+C or CTRL+INSERT
Copy Format CTRL+SHIFT+C
Copy Text SHIFT+F2
Create Auto Text ALT+F3
Customize Add Menu ALT+CTRL+=
Customize Keyboard ALT+CTRL+NUM +
Customize Remove Menu ALT+CTRL+-
Cut CTRL+X or SHIFT+DELETE
Date Field ALT+SHIFT+D
Delete Back Word CTRL+BACKSPACE
Delete Word CTRL+DELETE
Dictionary ALT+SHIFT+F7
Do Field Click ALT+SHIFT+F9
Doc Close CTRL+W or CTRL+F4
Doc Maximize CTRL+F10
Doc Move CTRL+F7
Doc Restore CTRL+F5
Doc Size CTRL+F8
Doc Split ALT+CTRL+S
Double Underline CTRL+SHIFT+D
End of Column ALT+PAGE DOWN
End of Column ALT+SHIFT+PAGE DOWN
End of Doc Extend CTRL+SHIFT+END
End of Document CTRL+END
End of Line END
End of Line Extend SHIFT+END
End of Row ALT+END
End of Row ALT+SHIFT+END
End of Window ALT+CTRL+PAGE DOWN
End of Window Extend ALT+CTRL+SHIFT+PAGE DOWN
Endnote Now ALT+CTRL+D
Extend Selection F8
Field Chars CTRL+F9
Field Codes ALT+F9
Find CTRL+F
Font CTRL+D or CTRL+SHIFT+F
Font Size Select CTRL+SHIFT+P
Footnote Now ALT+CTRL+F
Go Back SHIFT+F5 or ALT+CTRL+Z
Go To CTRL+G or F5
Grow Font CTRL+SHIFT+.
Grow Font One Point CTRL+]
Hanging Indent CTRL+T
Header Footer Link ALT+SHIFT+R
Help F1
Hidden CTRL+SHIFT+H
Hyperlink CTRL+K
Indent CTRL+M
Italic CTRL+I or CTRL+SHIFT+I
Justify Para CTRL+J
Left Para CTRL+L
Line Down DOWN
Line Down Extend SHIFT+DOWN
Line Up UP
Line Up Extend SHIFT+UP
List Num Field ALT+CTRL+L
Lock Fields CTRL+3 or CTRL+F11
Macro ALT+F8
Mail Merge Check ALT+SHIFT+K
Mail Merge Edit Data Source ALT+SHIFT+E
Mail Merge to Doc ALT+SHIFT+N
Mail Merge to Printer ALT+SHIFT+M
Mark Citation ALT+SHIFT+I
Mark Index Entry ALT+SHIFT+X
Mark Table of Contents Entry ALT+SHIFT+O
Menu Mode F10
Merge Field ALT+SHIFT+F
Microsoft Script Editor ALT+SHIFT+F11
Microsoft System Info ALT+CTRL+F1
Move Text F2
New CTRL+N
Next Cell TAB
Next Field F11 or ALT+F1
Next Misspelling ALT+F7
Next Object ALT+DOWN
Next Window CTRL+F6 or ALT+F6
Normal ALT+CTRL+N
Normal Style CTRL+SHIFT+N or ALT+SHIFT+CLEAR (NUM 5)
Open CTRL+O or CTRL+F12 or ALT+CTRL+F2
Open or Close Up Para CTRL+0
Other Pane F6 or SHIFT+F6
Outline ALT+CTRL+O
Outline Collapse ALT+SHIFT+- or ALT+SHIFT+NUM -
Outline Demote ALT+SHIFT+RIGHT
Outline Expand ALT+SHIFT+=
Outline Expand ALT+SHIFT+NUM +
Outline Move Down ALT+SHIFT+DOWN
Outline Move Up ALT+SHIFT+UP
Outline Promote ALT+SHIFT+LEFT
Outline Show First Line ALT+SHIFT+L
Overtype INSERT
Page ALT+CTRL+P
Page Break CTRL+ENTER
Page Down PAGE DOWN
Page Down Extend SHIFT+PAGE DOWN
Page Field ALT+SHIFT+P
Page Up PAGE UP
Page Up Extend SHIFT+PAGE UP
Para Down CTRL+DOWN
Para Down Extend CTRL+SHIFT+DOWN
Para Up CTRL+UP
Para Up Extend CTRL+SHIFT+UP
Paste CTRL+V or SHIFT+INSERT
Paste Format CTRL+SHIFT+V
Prev Cell SHIFT+TAB
Prev Field SHIFT+F11 or ALT+SHIFT+F1
Prev Object ALT+UP
Prev Window CTRL+SHIFT+F6 or ALT+SHIFT+F6
Print CTRL+P or CTRL+SHIFT+F12
Print Preview CTRL+F2 or ALT+CTRL+I
Proofing F7
Redo ALT+SHIFT+BACKSPACE
Redo or Repeat CTRL+Y or F4 or ALT+ENTER
Repeat Find SHIFT+F4 or ALT+CTRL+Y
Replace CTRL+H
Reset Char CTRL+SPACE or CTRL+SHIFT+Z
Reset Para CTRL+Q
Revision Marks Toggle CTRL+SHIFT+E
Right Para CTRL+R
Save CTRL+S or SHIFT+F12 or ALT+SHIFT+F2
Save As F12
Select All CTRL+A or CTRL+CLEAR(NUM 5)or CTRL+NUM 5
Select Table ALT+CLEAR (NUM 5)
Show All CTRL+SHIFT+8
Show All Headings ALT+SHIFT+A
Show Heading1 ALT+SHIFT+1
Show Heading2 ALT+SHIFT+2
Show Heading3 ALT+SHIFT+3
Show Heading4 ALT+SHIFT+4
Show Heading5 ALT+SHIFT+5
Show Heading6 ALT+SHIFT+6
Show Heading7 ALT+SHIFT+7
Show Heading8 ALT+SHIFT+8
Show Heading9 ALT+SHIFT+9
Shrink Font CTRL+SHIFT+,
Shrink Font One Point CTRL+[
Small Caps CTRL+SHIFT+K
Space Para1 CTRL+1
Space Para15 CTRL+5
Space Para2 CTRL+2
Spike CTRL+SHIFT+F3 or CTRL+F3
Start of Column ALT+PAGE UP
Start of Column ALT+SHIFT+PAGE UP
Start of Doc Extend CTRL+SHIFT+HOME
Start of Document CTRL+HOME
Start of Line HOME
Start of Line Extend SHIFT+HOME
Start of Row ALT+HOME
Start of Row ALT+SHIFT+HOME
Start of Window ALT+CTRL+PAGE UP
Start of Window Extend ALT+CTRL+SHIFT+PAGE UP
Style CTRL+SHIFT+S
Subscript CTRL+=
Superscript CTRL+SHIFT+=
Symbol Font CTRL+SHIFT+Q
Thesaurus SHIFT+F7
Time Field ALT+SHIFT+T
Toggle Field Display SHIFT+F9
Toggle Master Subdocs CTRL+\
Tool SHIFT+F1
Un Hang CTRL+SHIFT+T
Un Indent CTRL+SHIFT+M
Underline CTRL+U or CTRL+SHIFT+U
Undo CTRL+Z or ALT+BACKSPACE
Unlink Fields CTRL+6 or CTRL+SHIFT+F9
Unlock Fields CTRL+4 or CTRL+SHIFT+F11
Update Auto Format ALT+CTRL+U
Update Fields F9 or ALT+SHIFT+U
Update Source CTRL+SHIFT+F7
VBCode ALT+F11
Web Go Back ALT+LEFT
Web Go Forward ALT+RIGHT
Word Left CTRL+LEFT
Word Left Extend CTRL+SHIFT+LEFT
Word Right CTRL+RIGHT
Word Right Extend CTRL+SHIFT+RIGHT
Word Underline CTRL+SHIFT+W
To know more, click here. 


Rules for Bengali Typing in PDF (Bijoy Layout)


Bengali Fonts in Keyboard


Bijoy is the most popular layout for Bangla typing. The layout was developed by Mostafa Jabbar. He is the pioneer of Bangla typing in computer. More than 90% people use his Bijoy layout for Bangla typing.


Today, I'm gonna share a PDF file with you that contains the Bijoy Keyboard layout with English fonts! If your keyboard doesn't have begnali fonts then you can print this PDF file to know where the bengali fonts are located in your keyboard. Additionally this file contains all the necessary rules and tips which are essential for Bangla Typing. 


Now there are many other software available for Bangla Typing Layout. Such as Avro Easy, Unicode, Unibijoy etc. And there rules are also somewhat different from Bijoy. And some of their layouts follow the same rules like Bijoy. Hopefully this PDF file will support most of the rules when a layout is similar to Bijoy Layout. 


Download the PDF file from the button below. Follow my instructions properly. And I can guarantee you will be able to type Bengal within a week! 


Download Button PNG Icon


Sometimes you may not able to view Bengali text in webpages. Or you may not read some files clearly. Because you have some fonts missing. In that case you can download and install the fonts pack from the above link. Download and install the fonts in your font folder from control panel. This will be very helpful if you have any problem viewing Bengali text. 

Monday, March 26, 2012

Sign up in Hotmail


Internet users heavily depend on Google and Yahoo in order to use free email service. Google provides only Gmail and Yahoo provides Yahoo, Rocket mail and Ymail. 

Another popular email service is Hotmail that is provided by Microsoft. In this post I am gonna show you how to sign up to a Hotmail account. This is very simple. Just follow the steps below: 

  1. First go to this link. It will take you to the sign up page. 
  2. Now type your desired address and select either hotmail or live from drop down menu. For example: munnamark@live.com or munnamark@hotmail.com
  3. Now create a strong password. Mix your password with special character (@, !, $ etc), number and capital letter. 
  4. Select your country and type your phone number below it. 
  5. Now you can either enter an alternate email address or choose a security question as a password reset option.
  6. Then put your First name and Last name.
  7. Select your country or region.
  8. Enter your ZIP code. 
  9. Select your Gender. 
  10. Insert your Birth Date.
  11. Now enter the captcha correctly. 
  12. Now hit on I accept button. 
Now you're almost done. If everything is correct then you will be able to sign in your account immediately after clicking I accept button. 

Find your Files Less than a Second !!


Search Files Faster

Very often you may need to search for a file or folder in your hard disk. If you know the exact location of that file then there is no problem. But if you work with numerous number of files and folders then it will be really difficult for you to find out the necessary file.

In Windows 7 there is an excellent indexing service for faster searching. Whenever you type something in Windows 7, you can see the results immediately. But Windows XP is not as fast as Windows 7. And to be honest, the search option of XP is not smart enough. 


Though Windows 7 has a great search engine, sometimes it may not show some files. But you can install a small program to search your computer faster than windows search engine. 

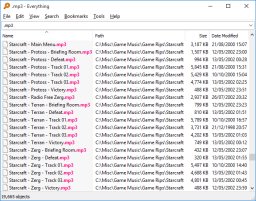
By Everything you can search any files stored in your hard disk. You will make no mistake. And it is capable of showing any file within milliseconds!

And if you're using Windows 8, you might notice that its search performance is not as good as Windows 7. Isn't it very strange? 

Actually in Windows 8, only the C Drive's files (Installation Drive) are indexed. Other drives are not indexed by default. In that case you can index the other drives by yourself. Read here to know more: Index Drives to Search Files Faster on Windows 8.


Everything Search Result


Features: 
  • Small installation file
  • Clean and simple user interface
  • Quick file indexing
  • Quick searching
  • Quick start up
  • Minimal resource usage
  • Small database on disk
  • real-time updating

Requirements: No Special Requirements
  • Works fine with all running versions of Windows. 


Search Your Hard Disk Drives


Instructions: 

Instruction is not necessary. Because this is very easy to download, install and operate. You just need to download the file from the link below. Then install it normally as you install  other applications. 

Now find the icon on your desktop or program list. Run the application. Then search for any file stored in your PC. Enjoy! 


Download Link